It has been nearly two years since I've shared progress on our family room.
This room started out as a kitchen to the back unit of the house (a two-unit rental when we bought it.) Back in 2014 (check out
this post) we had completed the floors, installed French doors leading out to the backyard, and purchased our gray sectional. Then it was pretty much radio silence.
We literally have not even used this room until a few months ago when we hosted Thanksgiving dinner and
needed the space.
It's funny how entertaining lights a fire under your decorating rear end! We finally moved our TV back there, as the antique built-in we purchased was stained, at long last, and ready to use. Because it was Thanksgiving, clearly there needed to be a room (or two!) to watch football.
So, with the TV moved, it was official. Family room!
Since then we have
lived in this room. Movie nights, snuggle time, play time, game time, and, of course, the kids LOVE the couch - wrestling, creating pillow forts and tunnels, having pillow fights...so all the throw pillows you see are
totally necessary. I no longer feel bad about money spent on fun toss pillows!
It's for the kids, babe!
The room hasn't really felt "decorated" (as in warm and personal) until recently, though. We still need a coffee table (which Hubby is going to make), an updated light fixture, and we are thinking of installing some wall sconces, since there isn't a lot of room for lamps due to the giant sectional.
But now that there are curtains (the key to a "finished" look!) I feel ready enough to declare progress!
 |
| 'stamped dot' curtains from west elm |
Here are some before and after shots, because it is always fun to see the 'then'...
...and the 'now' :
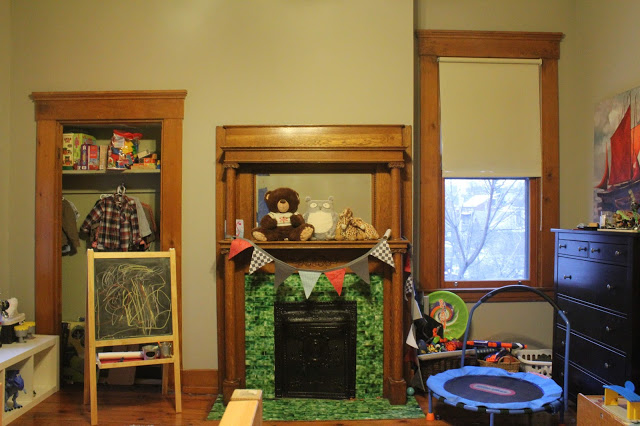
Then...
Now...
Then...
Now...
I still need to add a bit more decor to it, but I am okay doing this slowly, and having it look a little sparse. I resolved recently to keep only things that 'spark joy' in our home, so I hesitate to just try to "fill space."
You should definitely hold out (or just move stuff around) until it feels like 'your personal style' -- thus evoking comfort and joy.
 |
| St. Paul print found on Etsy (thank you, sweet in-laws!) |
 |
| All the framed art/photos have been in other rooms in the house...except that one on the right, of course...lol. |
 |
| We found this cabinet at an antique mall to replace the old, icky one that was there before. It looks like one we had in our first home...that I have missed ever since we lived there! |
 |
| I have been adding plants to the house over time...and, of course, needed one in this room. |
 |
| Plan is for Hubby to make a coffee table to replace that well-used black Lack IKEA side table. All in good time! |
 |
| since I was in 'decorating mode' I placed my few 'design books' in the built-in - hoping for inspiration! |
 |
| As you can see, keeping the couch 'in order' was a short and futile effort. This room is made for forts and jumping! |
 |
| view from the couch - the glass cabinet doors open up to reveal the tv. the dark stain is nice, as it kinda makes the tv disappear in there if it is off. |
 |
| I tried to find art around the house for the photo ledge (we used two from IKEA...ten bucks each!) that fit the "metropolitan vibe" I wanted. |
 |
| I'm glad we went with these photo ledges from IKEA -- I can change up the art without putting additional holes in the wall. Perfect for the non-committal decorator! |
 |
| these were in the former guest room...so they've made a home here (for now.) |
 |
| I didn't work too hard to make the couch look perfect...you can see the chaise is a favorite place to lay! |
 |
| Hubby made these gas pipe curtain rods for me for Christmas...I loooooooove them! |
 |
| I've wanted curtain rods like these for ages, and Hubby made it happen for $25 a piece (West Elm's price was at least three times that.) |
This room is now a room we love to be in together.
I like how much light comes in!
I love that we found a sectional to fit perfectly in the space. There is enough space that we can all pile together and cuddle, and yet we can also have personal space if we want it. We love moving the ottoman around to create an extra chaise lounge or "bed" depending on our needs!
I like that everything is simple, yet a bit playful.
The room has definitely come a long way in three years!
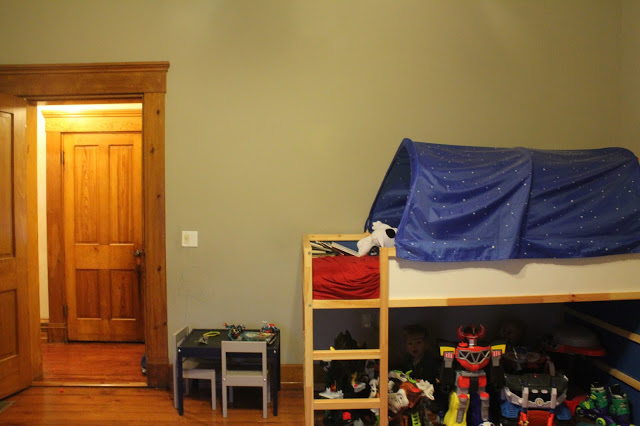
The kids, I'm sure, won't miss the construction zone you see below...
Our kids have literally grown from a toddler and newborn to two pre-schoolers during the renovation of this room!
So - family room complete!
On to the master bathroom!